As communicated by the Provost’s Office, engaging with your students through online Office Hours/Student Hours is more important now than ever before. Given that first-year students are generally unfamiliar with the concept of “office hours,” and that we’re currently conducting meetings online, this term seems even more irrelevant. For that reason, the Provost’s Office encourages you to refer to these times as “Student Hours.”
This document walks you through using a combination of Zoom and Canvas Calendar to set up and manage your Student Hours.
Contents
Scheduling a Recurring Meeting in Zoom
- Go to www.udel.edu/zoom and click Sign In to configure your account.
- Enter your UDelNetID and password.
- Click the Schedule a Meeting button on the right side of the page.

- At Topic, type Student Hours (per the recommendation from the Provost’s Office) or another clear, descriptive title. You may include an optional description.
- At When, choose the start time for office hours. At Duration, you can set the duration of the office hours on a given day.
Note: You can’t create split hours during the same day, but you can preclude specific times during the setup in the Canvas Scheduler tool if you choose to use it. In this case, we recommend setting the Duration to 8 hours and the start be set to 9am.)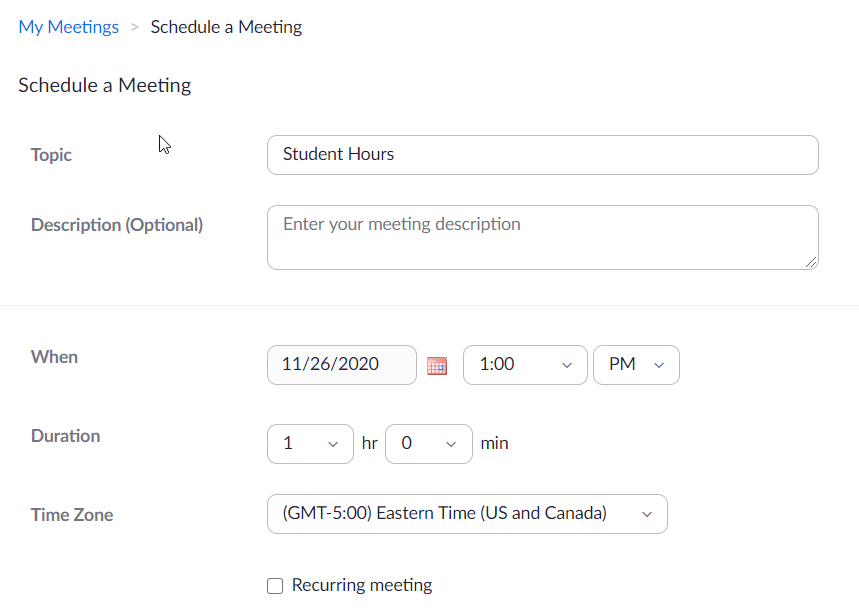
- Check the box next to Recurring meeting.
- At the Recurrence dropdown, select Weekly.
- At the Repeat every dropdown, select 1.
- Check the boxes next to the days of the week on which you will host Student Hours.
- Select an End date for the last date of office hours. (We recommend a date at the end of the semester.)
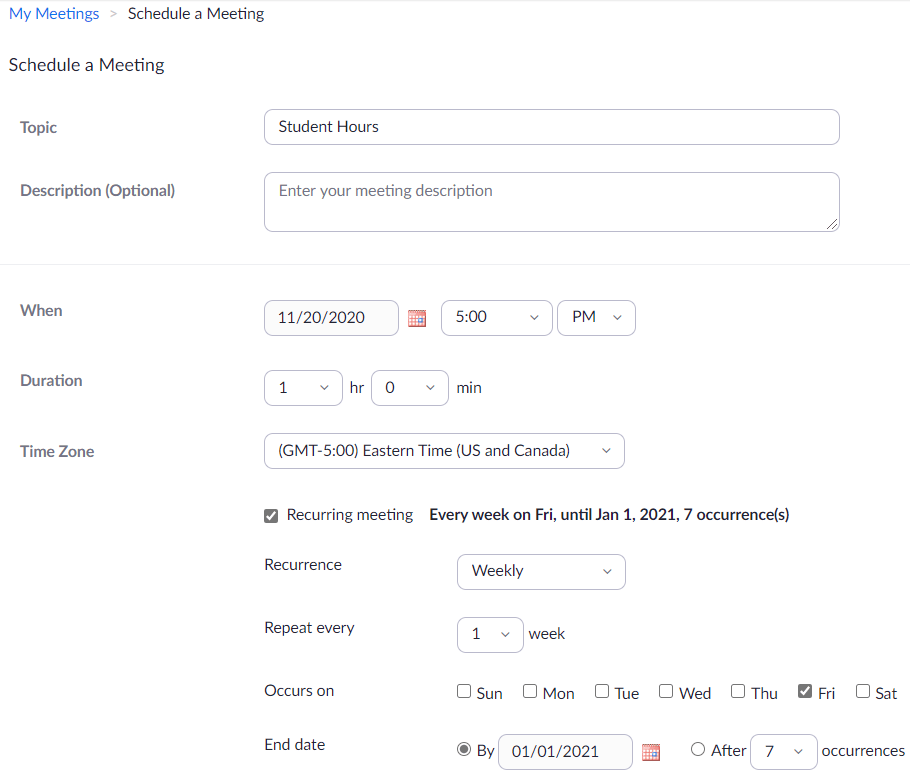
- Recommended settings on the Schedule a Meeting form:
- At Security, check the box to enable Waiting Room. This is crucial to keep students from interrupting other students’ appointment times. (Be sure your account settings will send “everyone” to the Waiting Room. Instructions can be found here.)
- At Audio, select Both to enable Telephone and Computer Audio.
- At Meeting Options, check the box to Require authentication to join, which prompts students to login using their UD credentials.
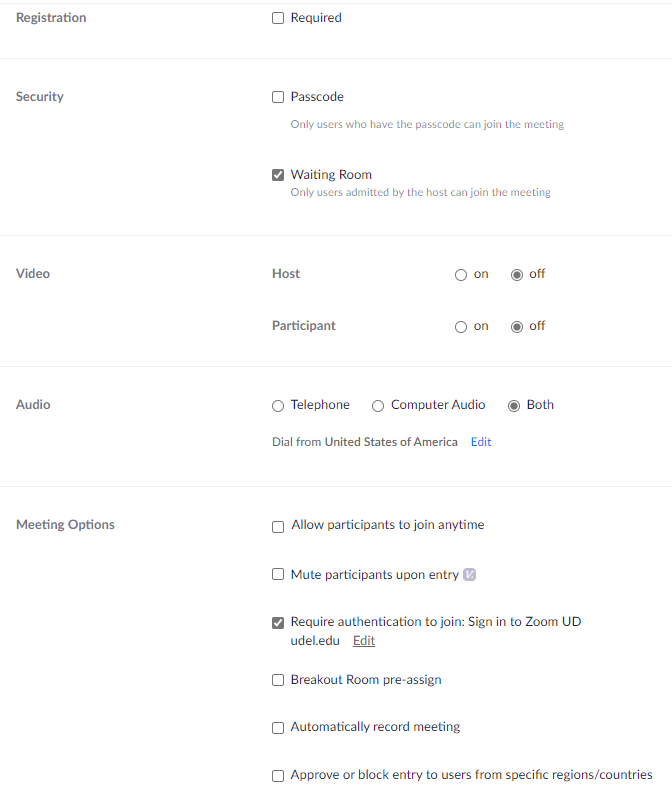
- Click the blue Save button at the bottom.
- Copy the Join URL to share with students or to use with the Canvas Scheduler tool (see next section).
Using the Canvas Appointment Group Scheduler
- In Canvas, click Calendar in the blue Global Navigation menu.
- Click the + button in the upper-right corner to create a new event.
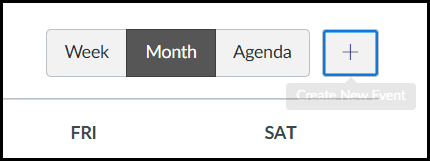
The Edit Event pop-up window displays.
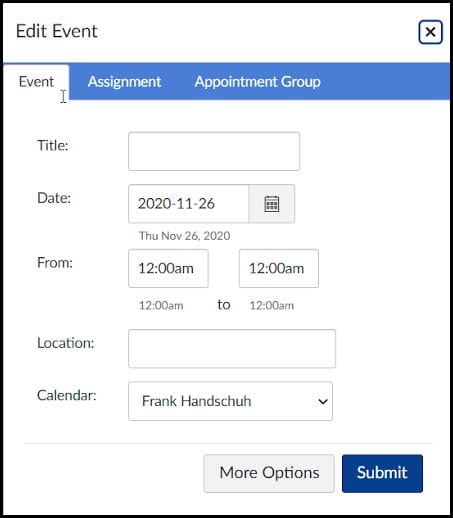
- Click the Appointment Group tab.
- Enter a title in the Name box. (Use the same name that you typed in the Zoom meeting Topic box in step 4 above).
- Enter details for your student hours (including the Zoom link you copied in step 11 above) in the Details box.
- Click the Select Calendars button, choose the course(s) from the list, and click Done in the course selection dropdown. (It’s possible to set student hours for multiple courses.)
- Enter the date for the first set of student hours in the Date box. Repeat this in each Date box on which you’ll host student hours. (There’s no way to set up a recurring appointment; each day must be entered manually.)
- In the Time Range fields, enter the start time for the earliest student hour on that date and the end time for the last student hour for that date. (In the next step, you’ll split that single block into smaller bookable time slots.)
- Enter the duration in the minutes field. Click Go. (This automatically splits each day into blocks of hours. Click X next to any hours that don’t apply.)
- Under Options, select the desired settings. For individual student hours, limit each time slot to 1 user.
- Click Publish.
Holding Zoom Student Hours
- Go to www.udel.edu/zoom and click the Sign in button.
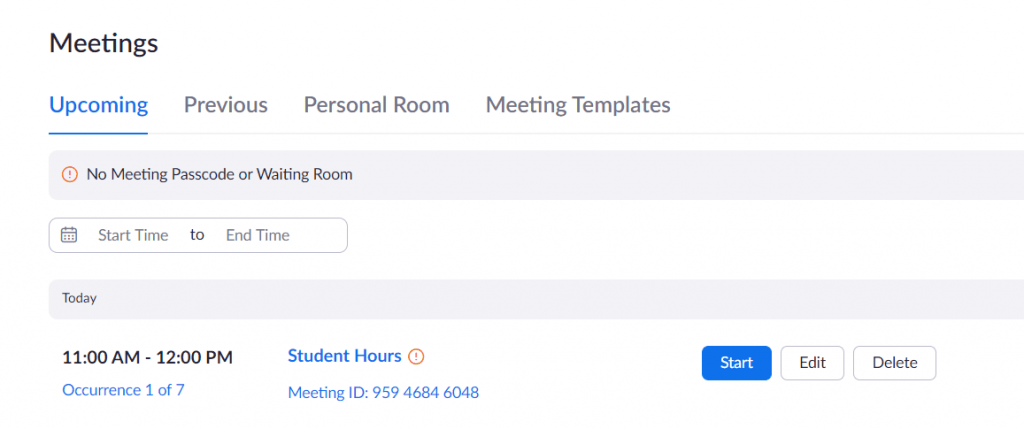
- Go to Meetings. The Upcoming tab displays with your upcoming and recurring meetings.
- Hover your mouse over a recurring Student Hours and click the Start button.
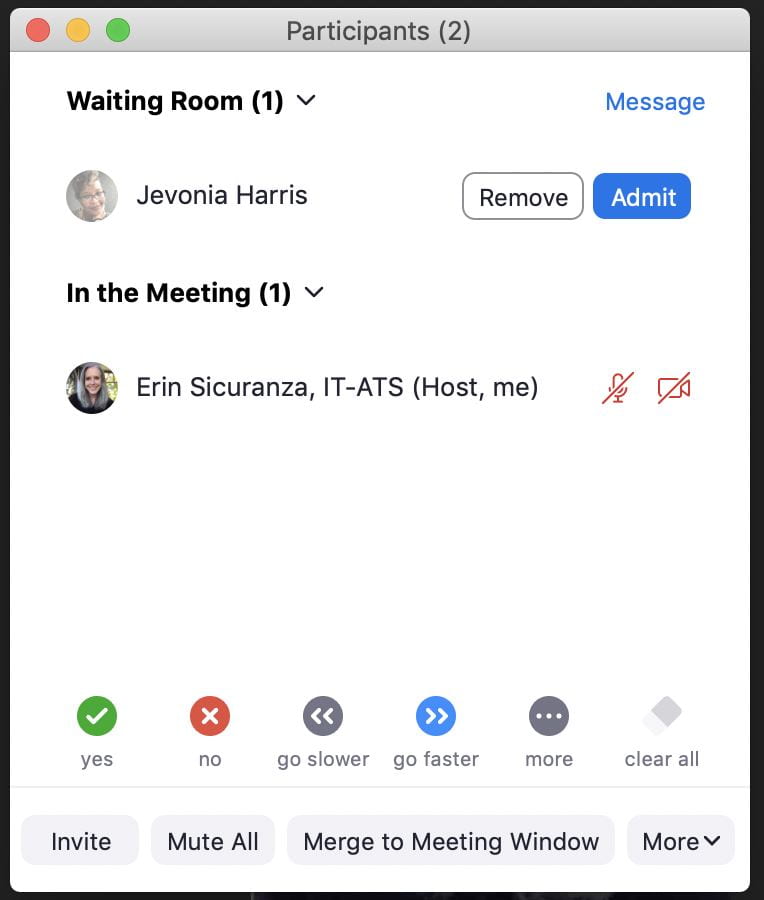
- Open the Participants list to see the Waiting Room. Use the Admit button to the right of the student’s name at the top. Other students in the Waiting Room will see the message, “Please wait, the meeting host will let you in soon.”)
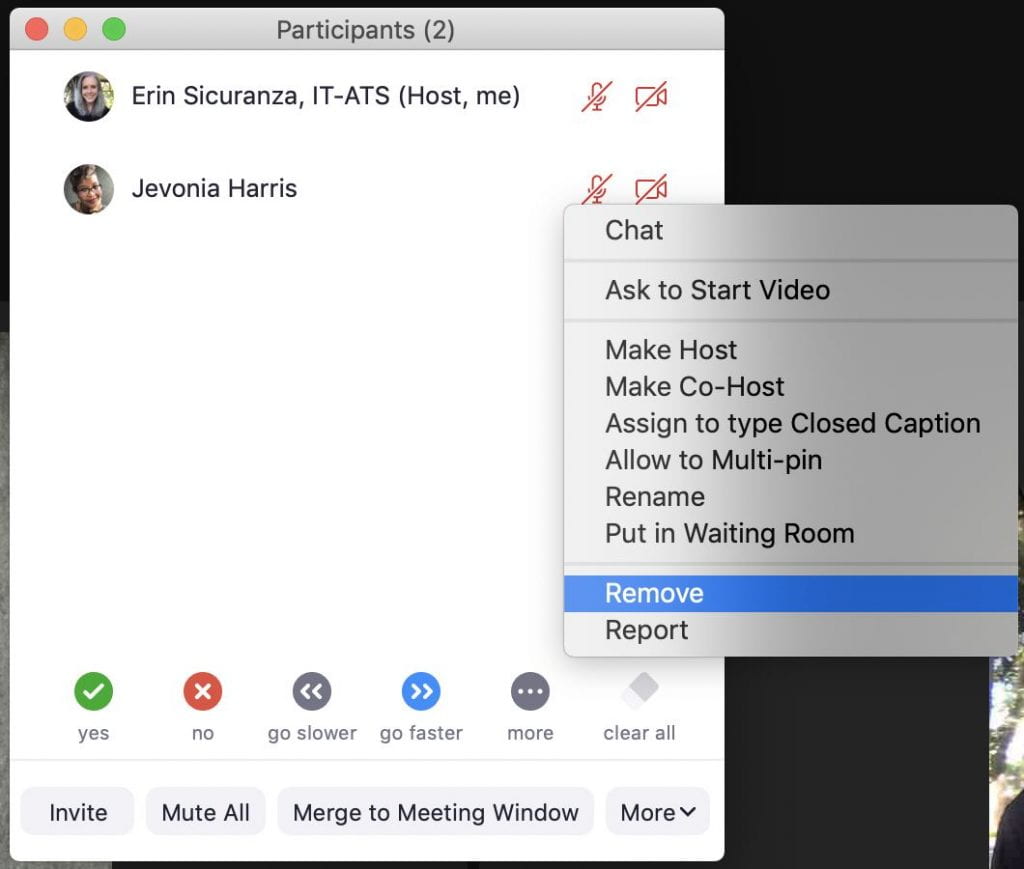
- To remove the current student before admitting the next one, click the blue More button next to the student’s name and select Put in waiting room. Choosing to actually remove the student will prevent them from rejoining.
- At the end of your scheduled Student Hours, click End Meeting in the lower right.
- To remove the current student before admitting the next one, click the blue More button next to the student’s name and select Put in waiting room. Choosing to actually remove the student will prevent them from rejoining.
