
UD Capture +Zoom – Overview
UDIT has updated the UD Capture classroom capture system by adding UD Capture +Zoom to select classrooms. This new system leverages using Zoom in the classroom and provides the ease of recording your classroom session with a single request, as before, but adds some new capabilities. These Zoom recordings are scheduled in advance, and are set to automatically record each requestor’s class session throughout the semester.
Learn more about UD Capture +Zoom including which classrooms are equipped and how to sign up to schedule your automatic classroom recording.
UD Capture +Zoom – Instant Meeting User Guide
Rooms enabled with UD Capture +Zoom are able to host both scheduled and non-scheduled (or instant) meetings. Confirm that your classroom is enabled with UD Capture +Zoom classroom capture by reviewing the enabled classrooms list. For prospective users looking to host an instant meeting in a classroom equipped with a Zoom Room, please follow these instructions below.
Step 1:Locate the touch panel in the classroom. |
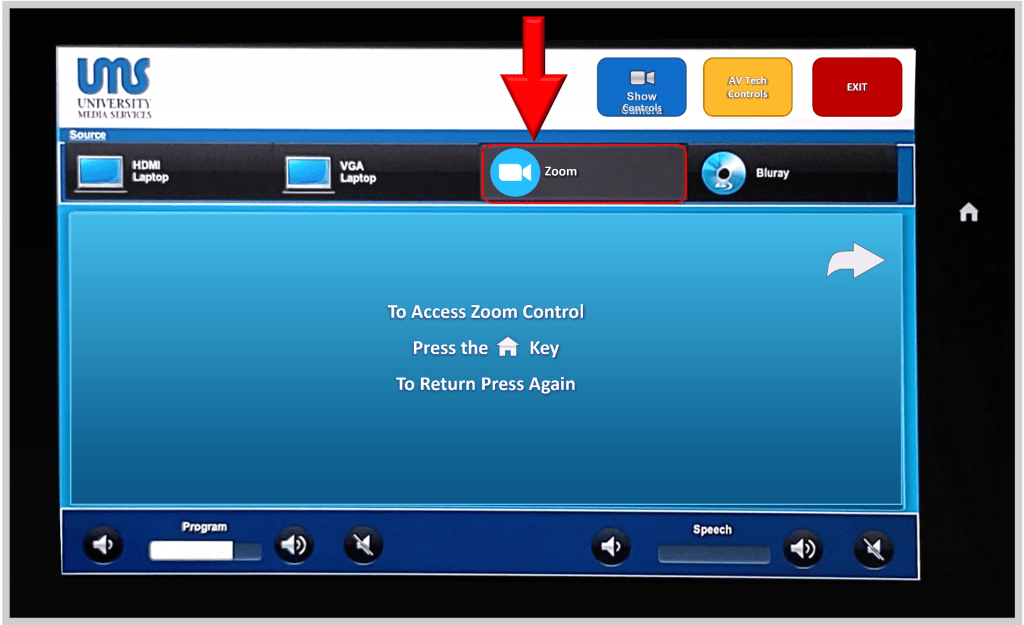 |
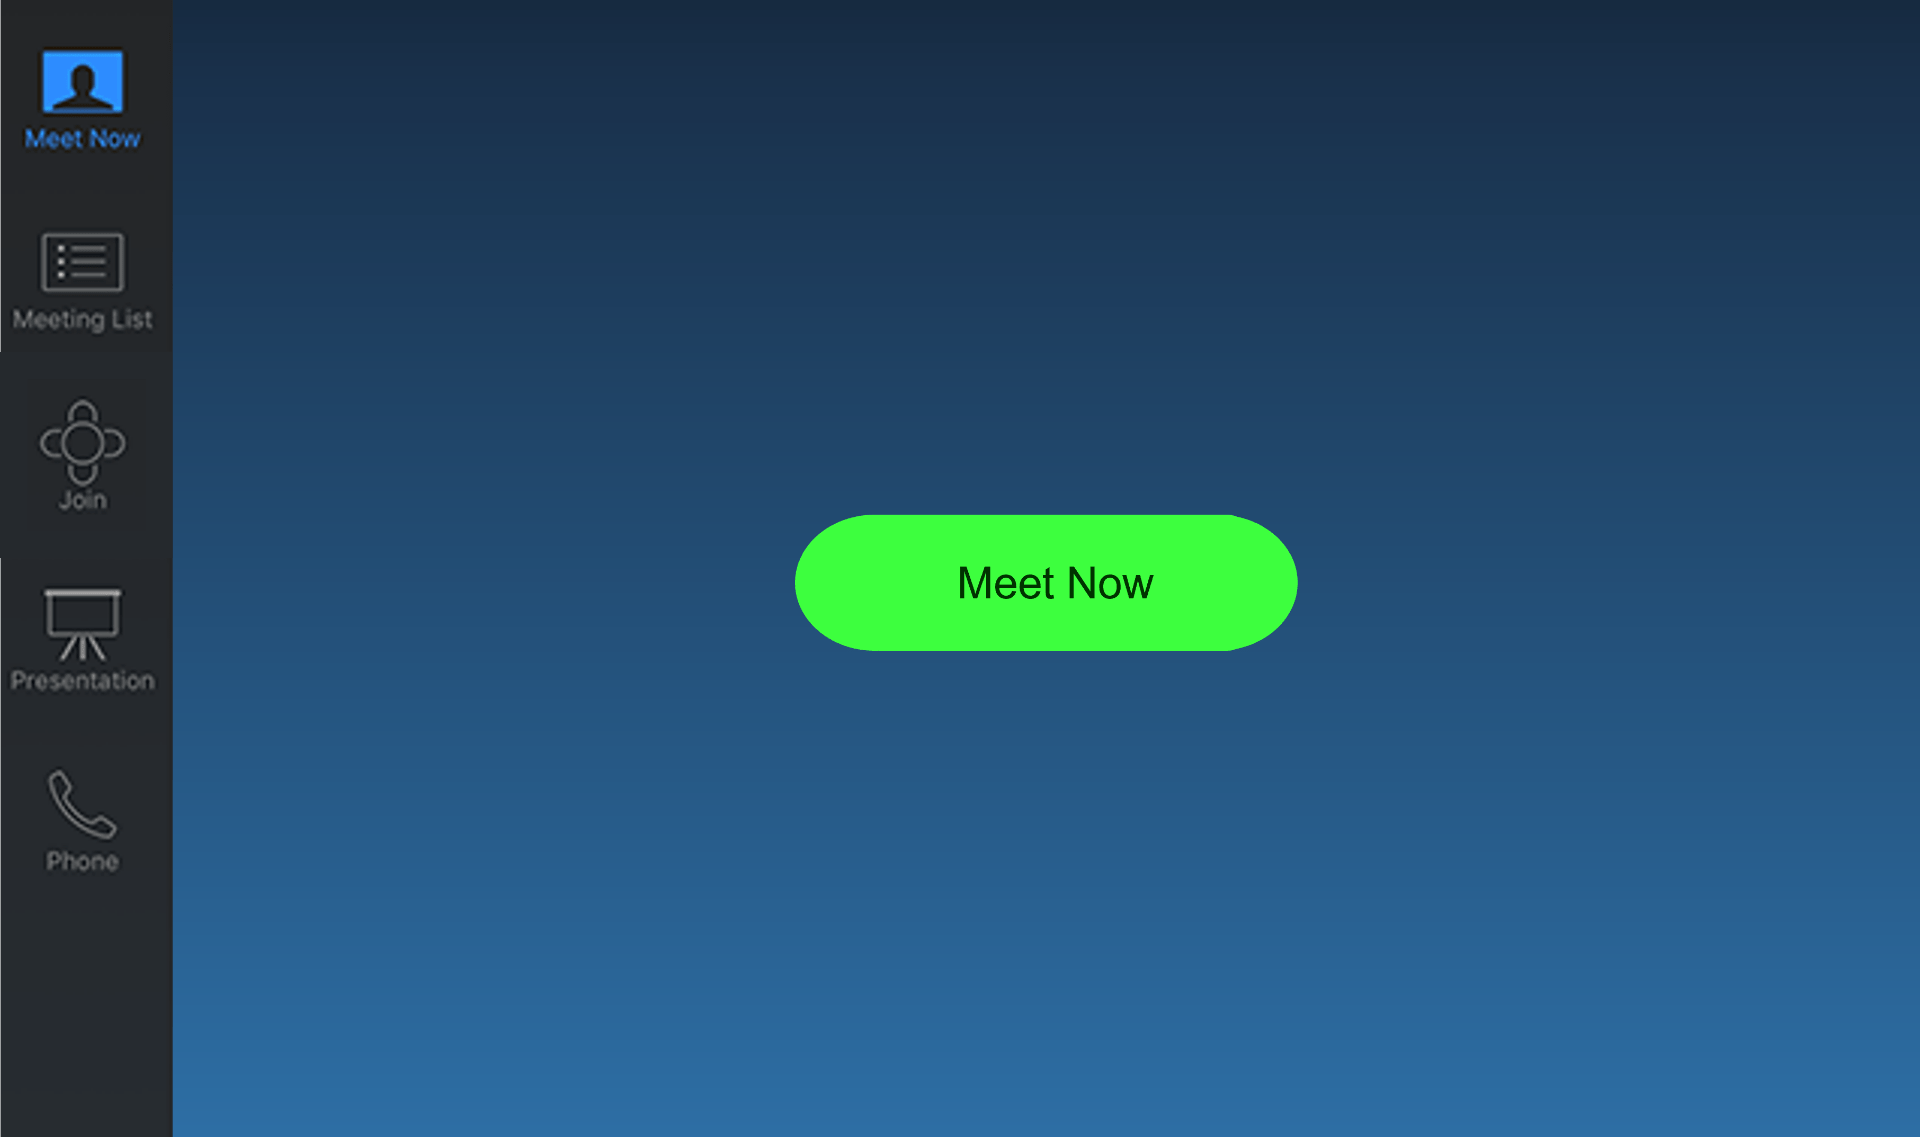
Step 2:Click “Meet Now” to launch a new zoom meeting. Alternatively, click the “Join” button on left side to join an existing Zoom meeting, by entering the meeting ID number. |
 |
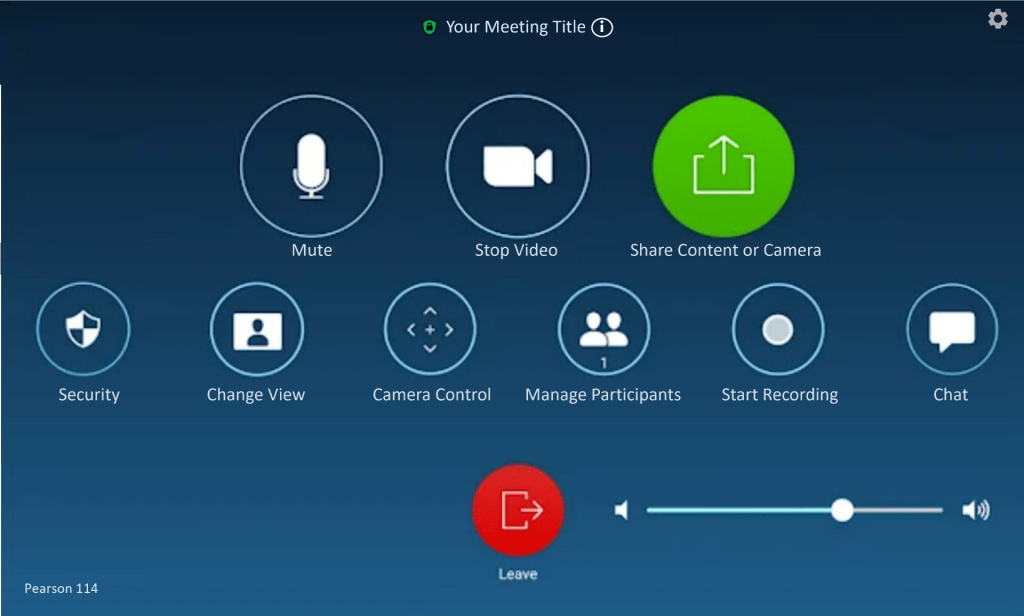
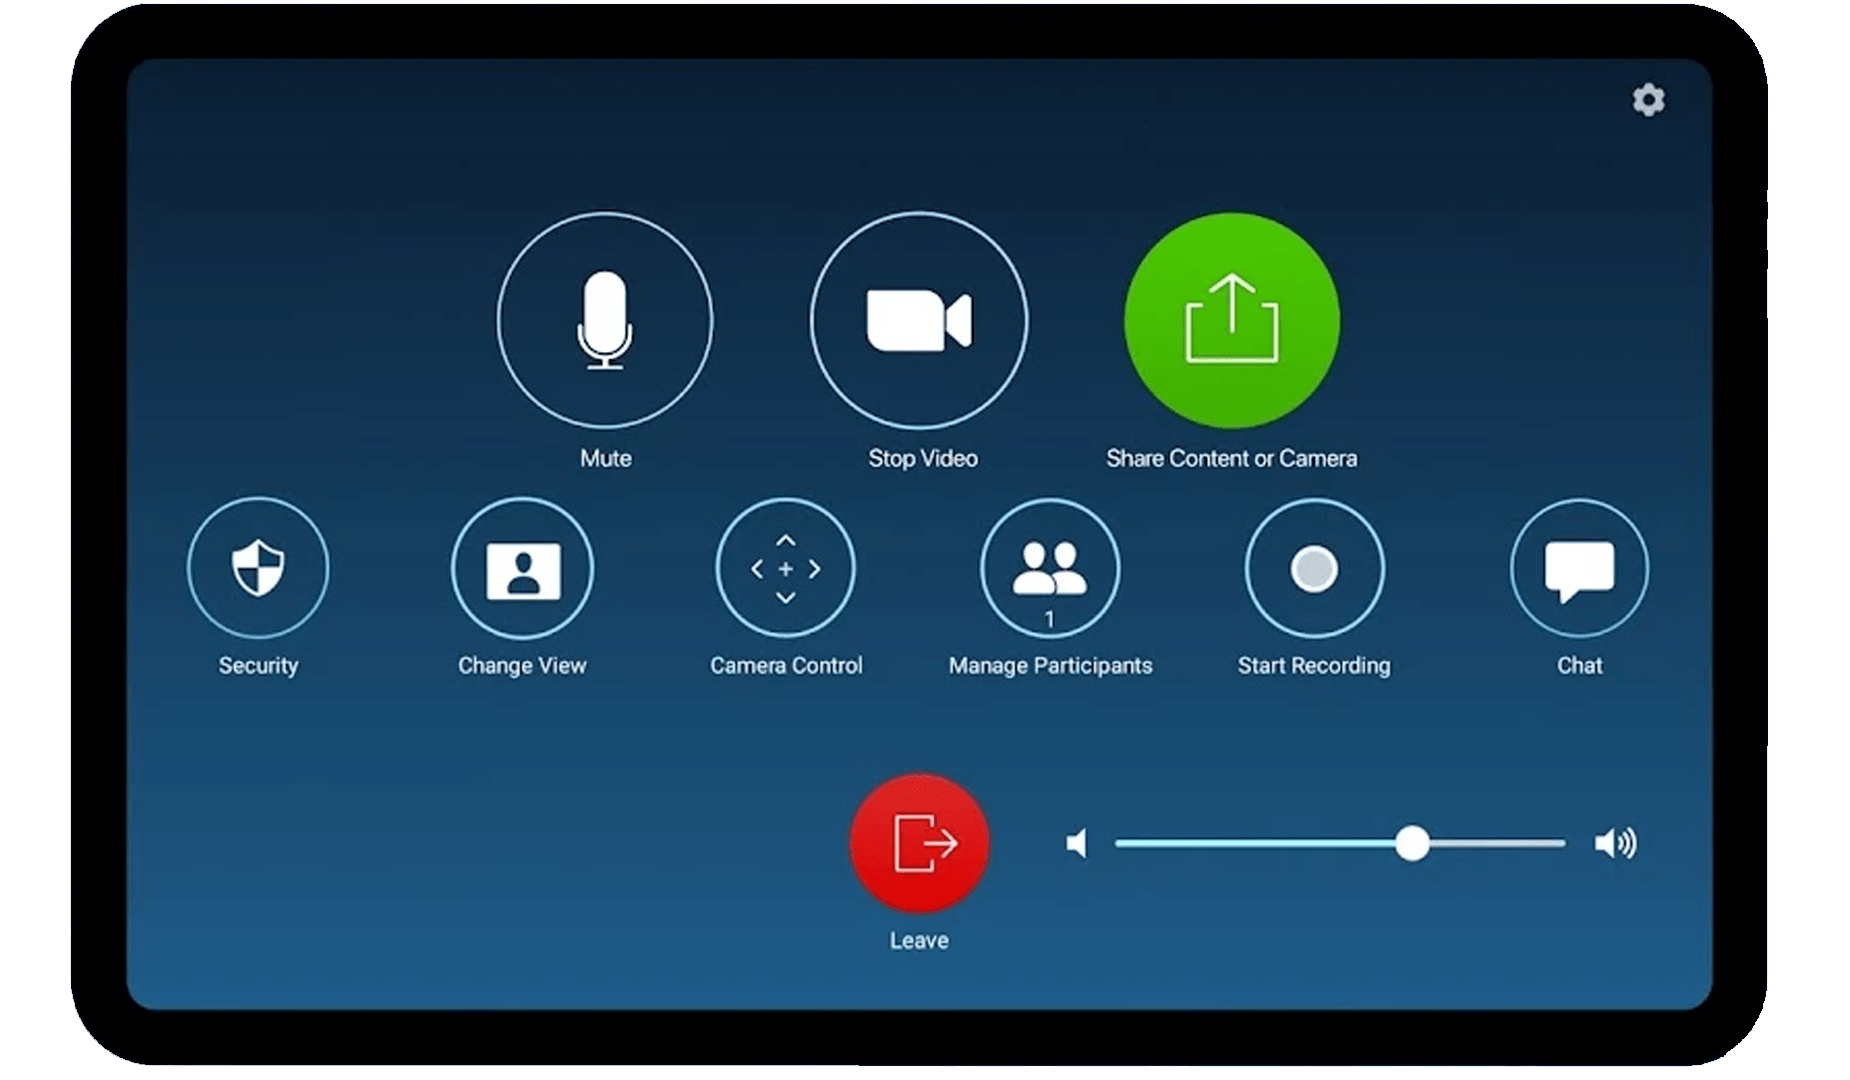
Step 3:The screen will display meeting controls, as depicted here: |
 |
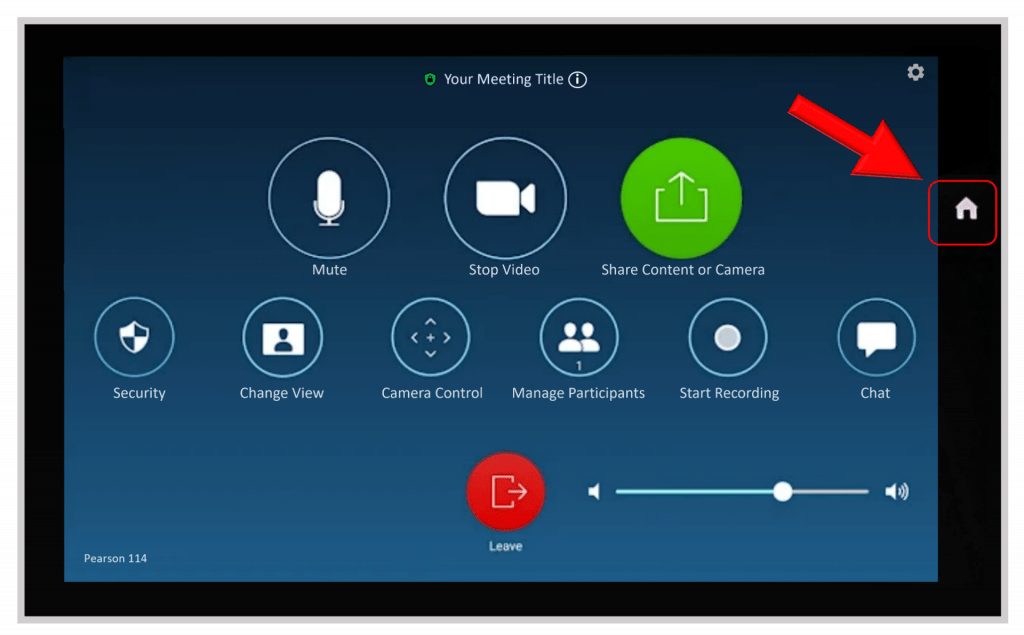
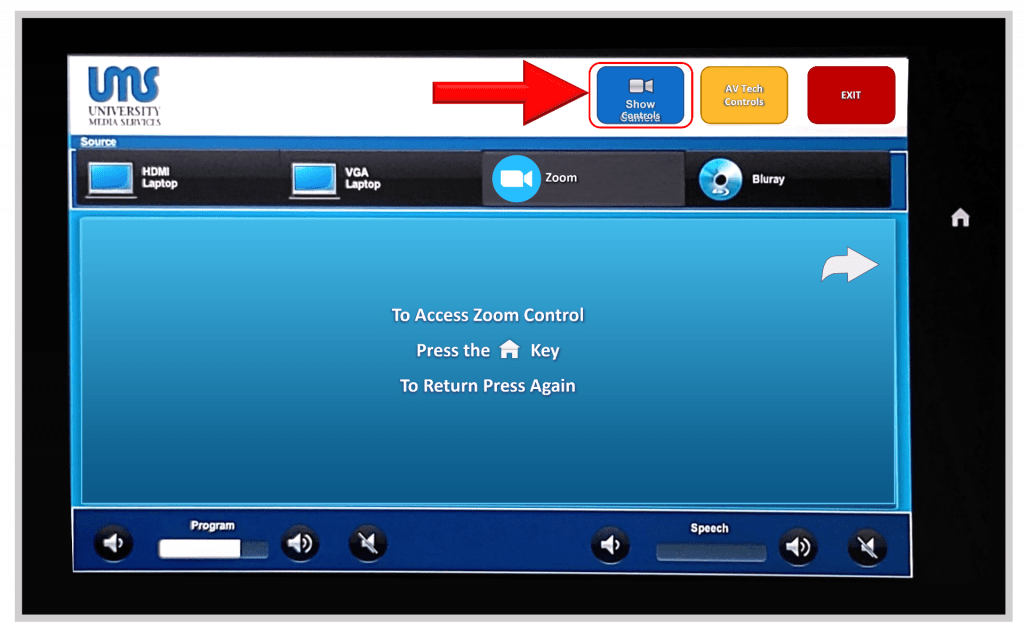
Step 4:You can turn the camera on or off, adjust the camera position, and zoom in or zoom out on the camera. To access the camera controls, click the Home button on the far right of the touch panel. |
|
| Then click the blue “Show Camera Controls” button at the top of the screen |
|
| The camera controls will appear on the screen. Click “Hide Camera Controls” to go back to the Zoom Meeting controls. |
|
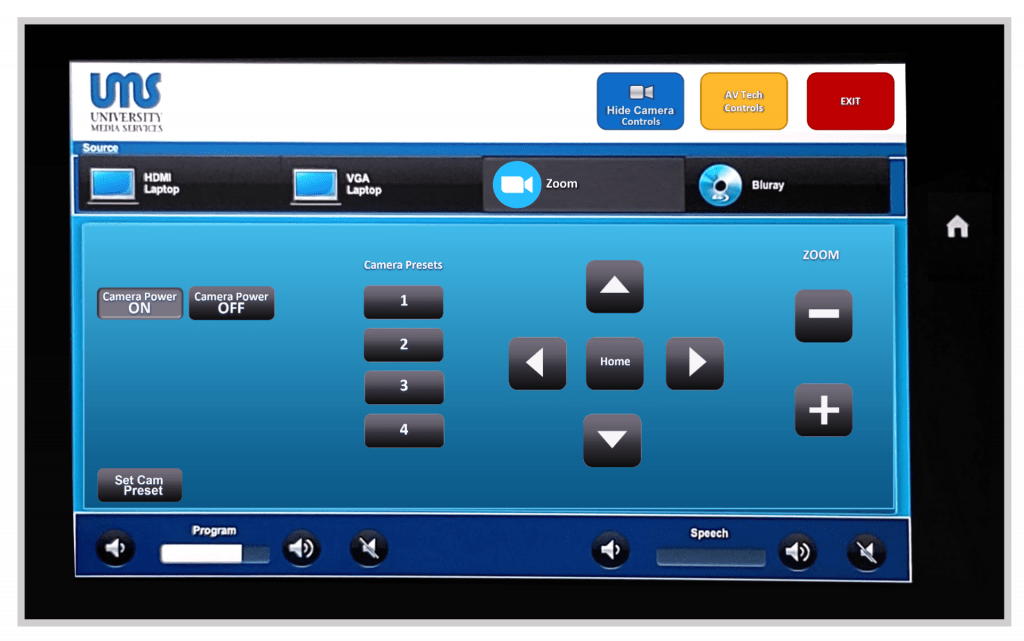
Zoom Room Touch Panel Controls:
![]()
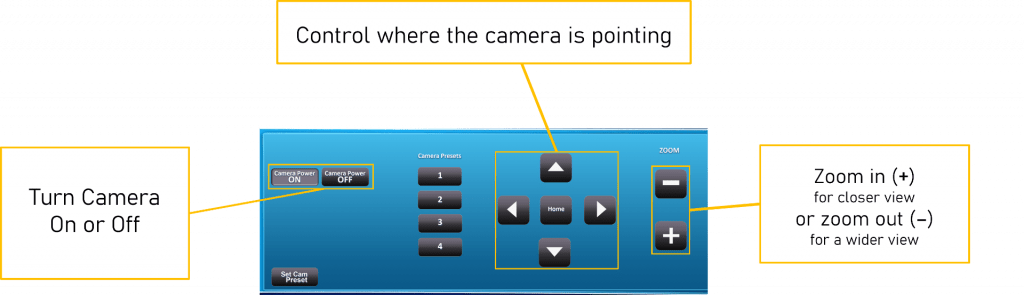
Camera Controller options labeled:
Other information:
Joining an existing meeting with a Zoom Room:
-
-
- You may use a Zoom Room to join a meeting scheduled and hosted by another user. However, participants who join a meeting via a Zoom Room, and are not the Host of the meeting, will not be able to record the meeting. If the Host allows participants to initiate recordings, only participants on computers will be able to record and save a recording to their own Zoom account.
-
Touch Panel Display:
-
-
- After a few minutes of no activity, the touch panel will revert back to displaying the home screen. This will not effect your meeting in progress, and will not deactivate the camera or microphone.
-
Inviting Participants:
-
-
- You may invite participants to your meeting by providing users with the Meeting ID number (click the “i” icon at the top of the Meeting Controls screen)
- You may invite participants to your meeting via email. To do this, use the Manage Participants button on the Meeting Controls screen, then click “Invite.” The email addresses you enter to invite will receive and email from no-reply@zoom.us
-