
For certain assignments, you may want to have students create a video and upload it to be graded. The following is one workflow that you can use to create a student video assignment in Canvas that uses the My Media tool (part of the UD Capture enhancements).
Faculty Directions
- If you don’t have the My Media tool visible in the Canvas Course Navigation menu on the left, you’ll first need to enable it so they’re visible to students.
- Go to your course in Canvas and click Assignments on the left.
- Click + Assignment. Give the new assignment a name and complete the information about the assignment for the student. You may want to include information about how to embed the video from My Media in their response.
- For Submission Type: Choose Online and check the box for Text Entry.
- Complete the rest of the assignment settings as needed (points, dates, etc).
- Click Save and Publish.
- When students submit their videos, you can use Speed Grader to see the submissions and play the videos.
- You can add an additional component to your assignment by allowing students to publish their works to the Canvas Media Gallery and optionally allow students to comment on peer works.
Student Directions
- For this assignment, you will create a video using Zoom. All UD students have access to a Zoom Pro account at UD. Please follow the instructions on this 2-page PDF Zoom quickstart guide for students. Following this guide is important as it will create your UD Zoom account for the first time and guide you to download and install Zoom.
- Next, sign in to UD Zoom. Perform a test meeting to ensure everything is working. Click New Meeting to start a new meeting. Adjust your camera or screen sharing settings as needed for your assignment.
- When you begin recording in Zoom, select Record to Cloud. When the recording is finished, it will be uploaded to the My Media tool in Canvas automatically. There is a delay for processing of the video. Processing time varies on the length but could take 24 hours so it’s best to plan ahead. If the recording doesn’t appear in My Media, you can upload it manually.
Note: If you cannot record to the Zoom cloud because of a HIPAA restriction or internet issues, you can instead record to your local computer and then upload the recording manually to My Media in Canvas. - In Canvas, click on Assignments in the course navigation menu. Click the assignment you need to complete. The Rich Text Editor (a mini word processor) should appear. To add the video, click the apps icon which looks like a power plug. Note: If you don’t see all the icons in the toolbar, enlarge or maximize your browser window.

The Select App window displays.
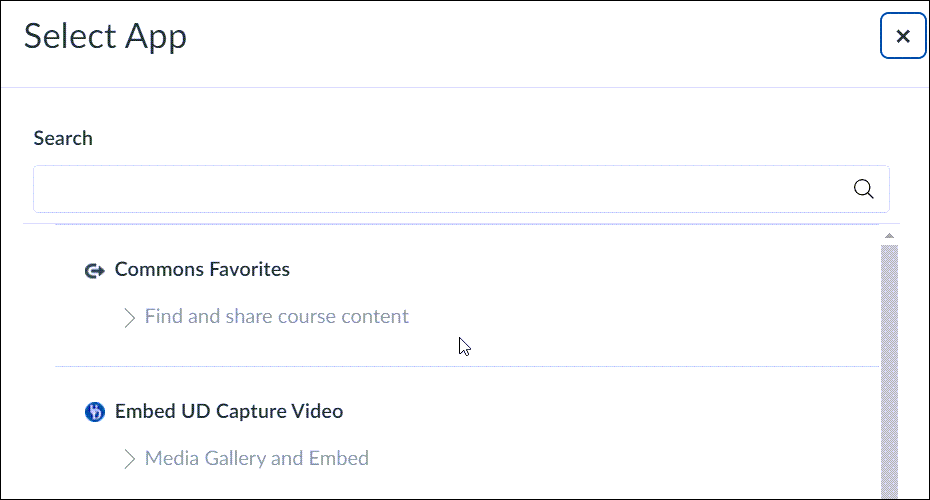
- Click the Embed UD Capture Video option. A popup displays showing your My Media and Media Gallery.
Note: After you select an app, a dropdown arrow displays next to the Apps icon so you select the app directly or click View All to select other apps. - In the Embed UD Capture Video popup window, find the video you want to use and click the “v” icon next to Select and choose Large.
- After a few moments, the video should appear in-line. You can also add any other text or images around the video as part of your assignment as needed.
- Click Submit to complete the assignment. Don’t delete your video from My Media. Doing so will remove it from your assignment submission.